


Implementing DWP GOV.UK cookie consent pattern in Wordpress
In this blog post we provide instructions on how to enable, configure and use the DWP consent pattern in a Wordpress based website.


Implementing the DWP consent pattern heavily depends on the contributed CIVIC Cookie Control Wordpress plugin, as it shares the actual Cookie Control script and a number of essential configuration options. The process of configuring the DWP GovUK pattern starts by downloading the Cookie Control plugin from the Wordpress repository and install it in an active Wordpress website.
Step 1: Install and Activate plugin
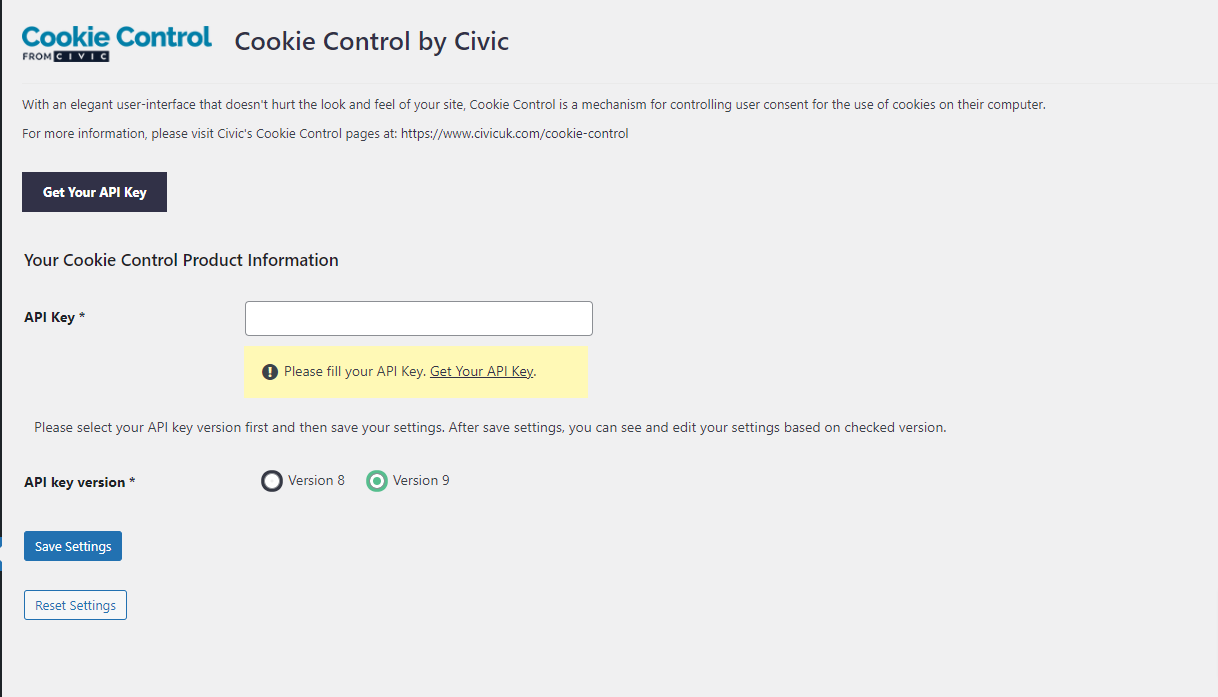
Before enabling the DWP GOV.UK pattern we need to properly configure the Cookie Control plugin. At this stage a valid Cookie Control API key, if not already available, should to be obtained and the Cookie Control license information in the corresponding form of the plugin settings page.
Step 2: Configure Cookie Categories
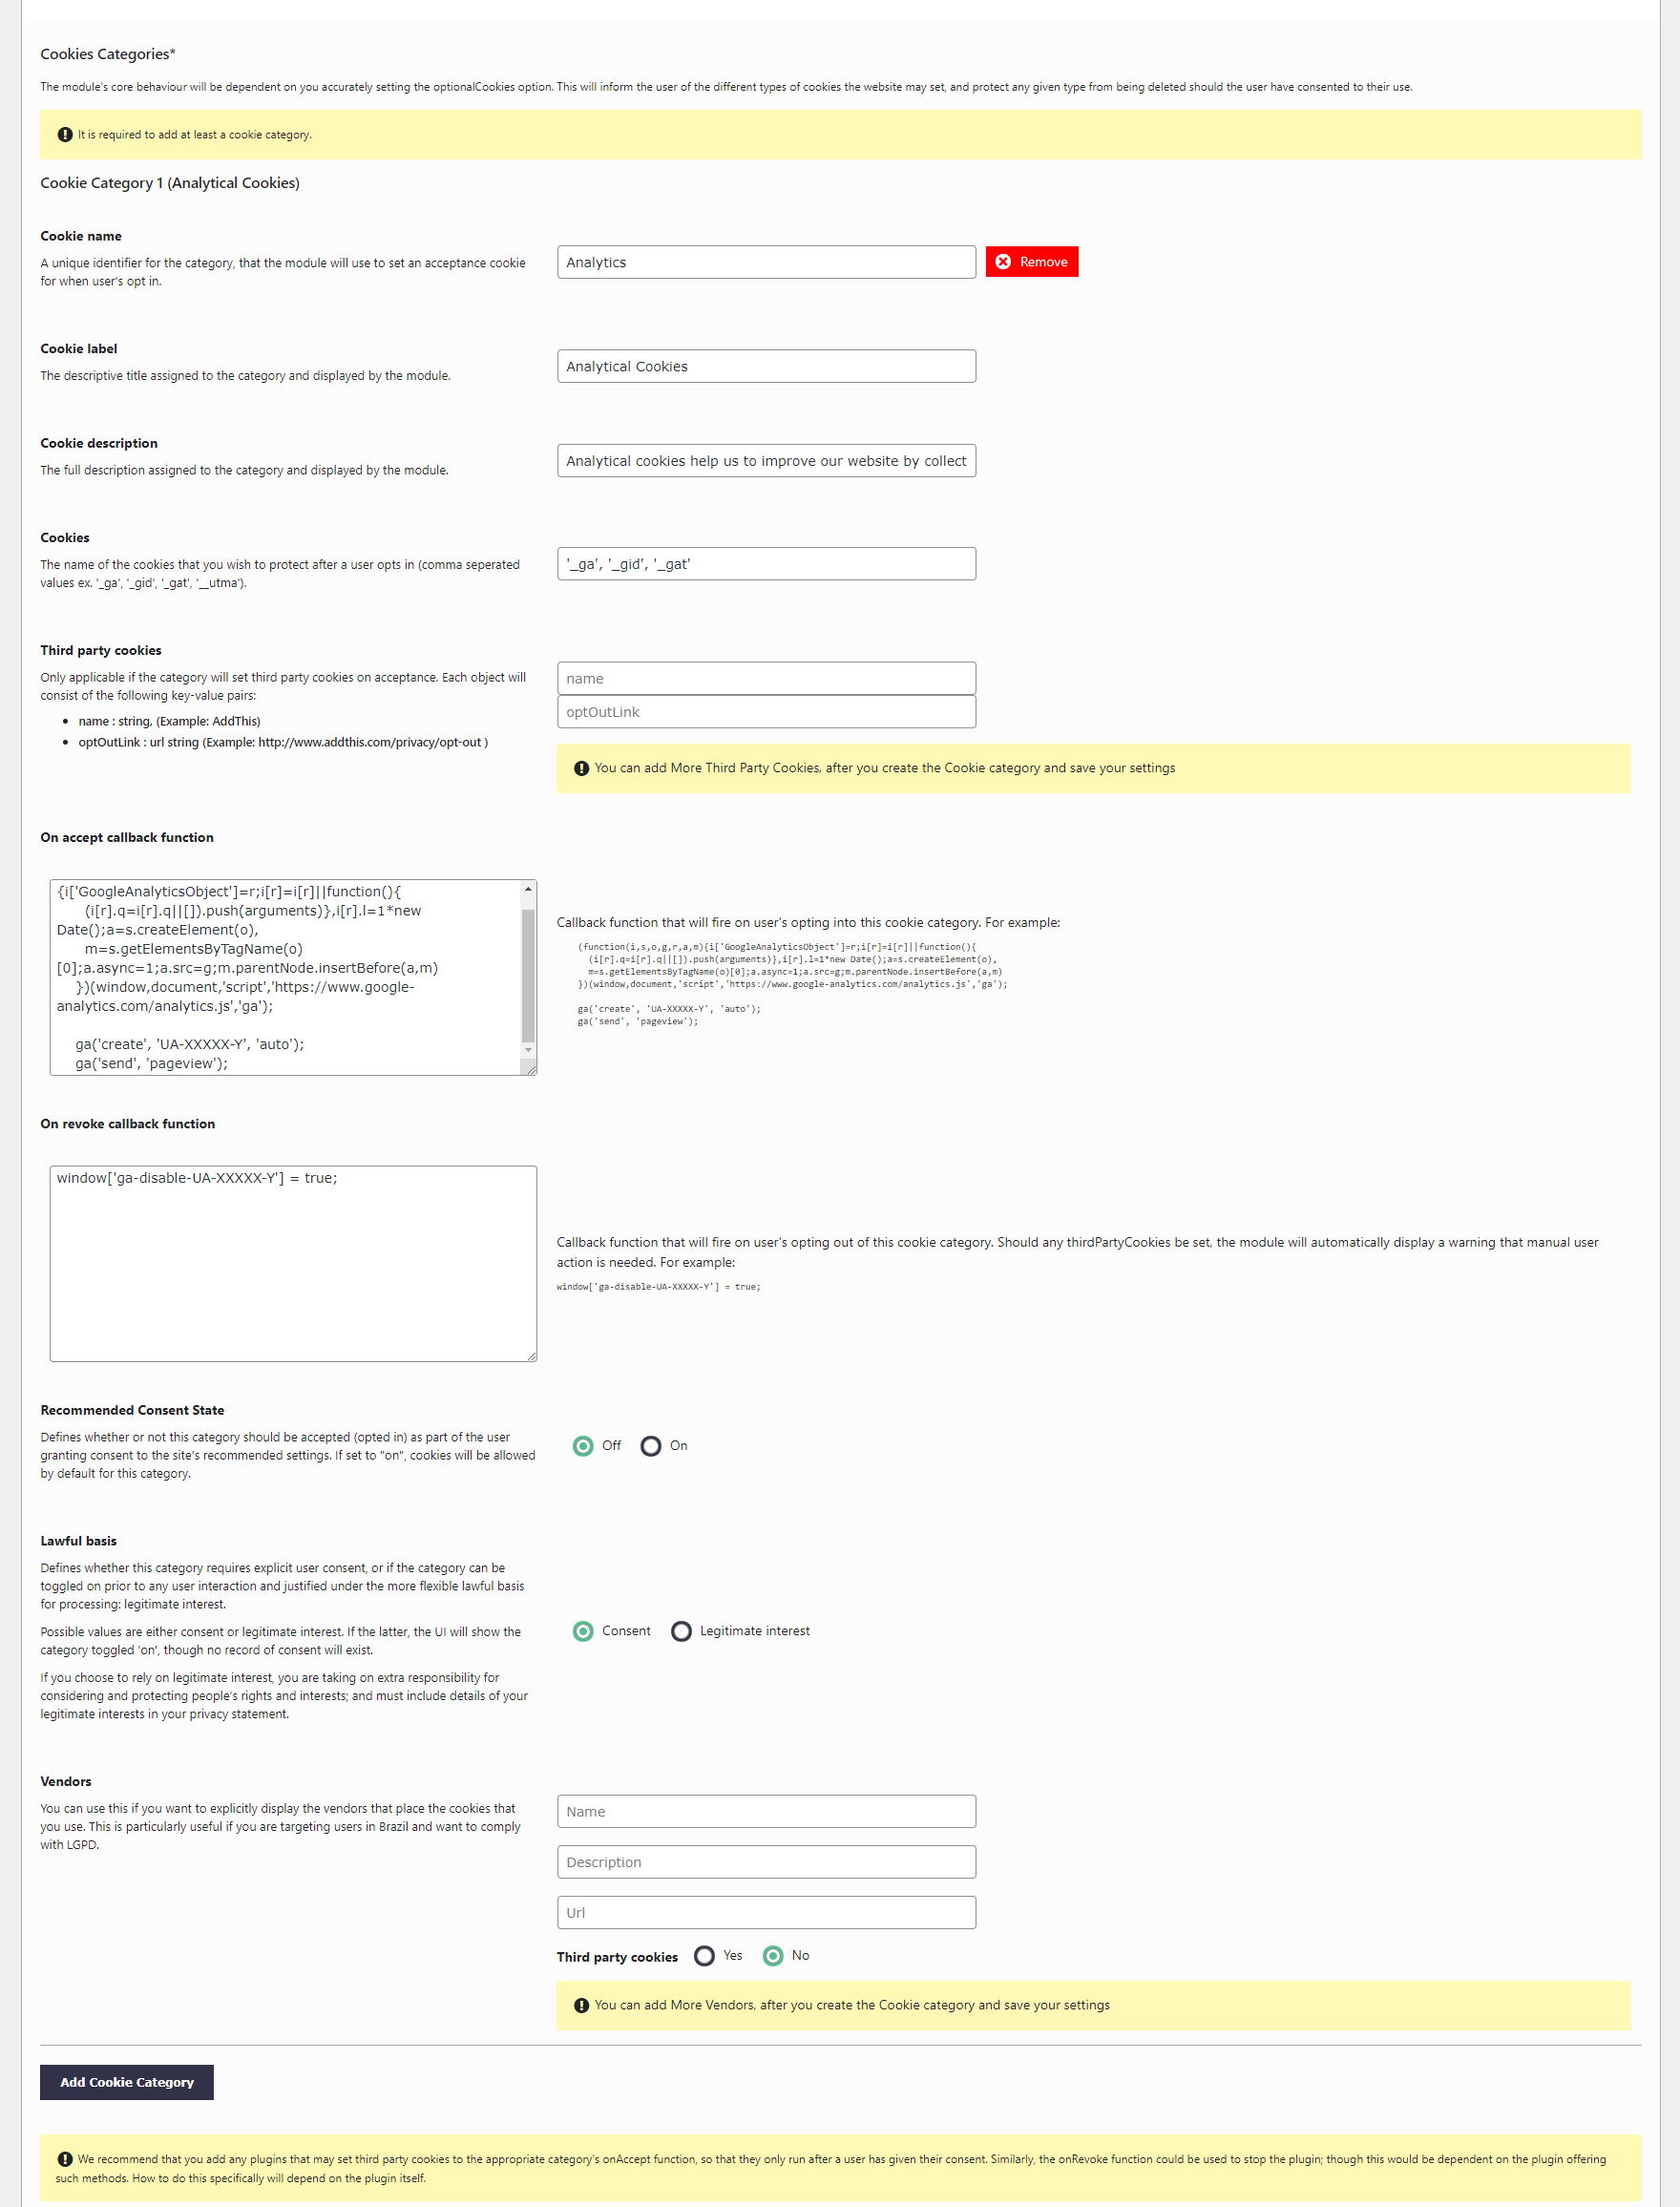
Once the license is validated and Cookie Control is actually enabled we need to add the Cookie Categories and the corresponding Cookies that will be used to toggle cookies on/off using the DWP interface or the usual Cookie Control widget. In the Cookies tab click the "Add Cookie Category" button and add an Analytics cookie category as show in the screenshot below.
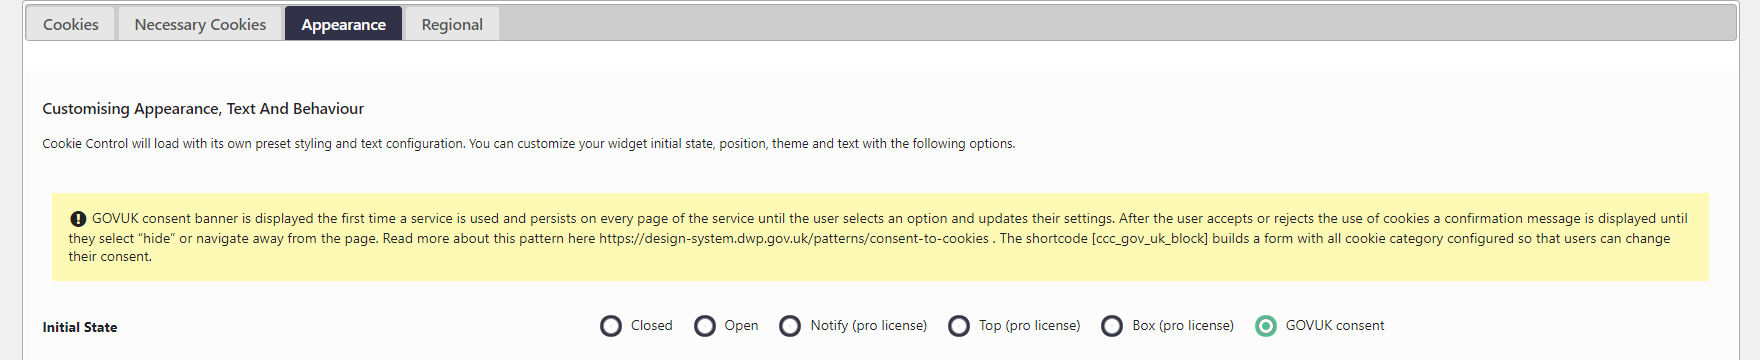
Step 3 : Configure GOVUK Consent Layout
Once the initial Cookie Control configuration is completed and the corresponding cookie categories are defined, we need to set the Cookie Control display mode to the one implementing the DWP cookie consent pattern. For this we select the GOV UK layout in the “Initial State” section of the “Appearance” tab.
At this stage we are ready to configure the textual elements appearing in the banner. As displayed in the screenshot below a number of fields is provided in the appearance tab to properly configure the banner layout. For example:
- Title,
- Introductory Text,
- Privacy or cookie policy URL,
- Privacy or cookie policy intro text,
- Privacy or cookie policy URL name,
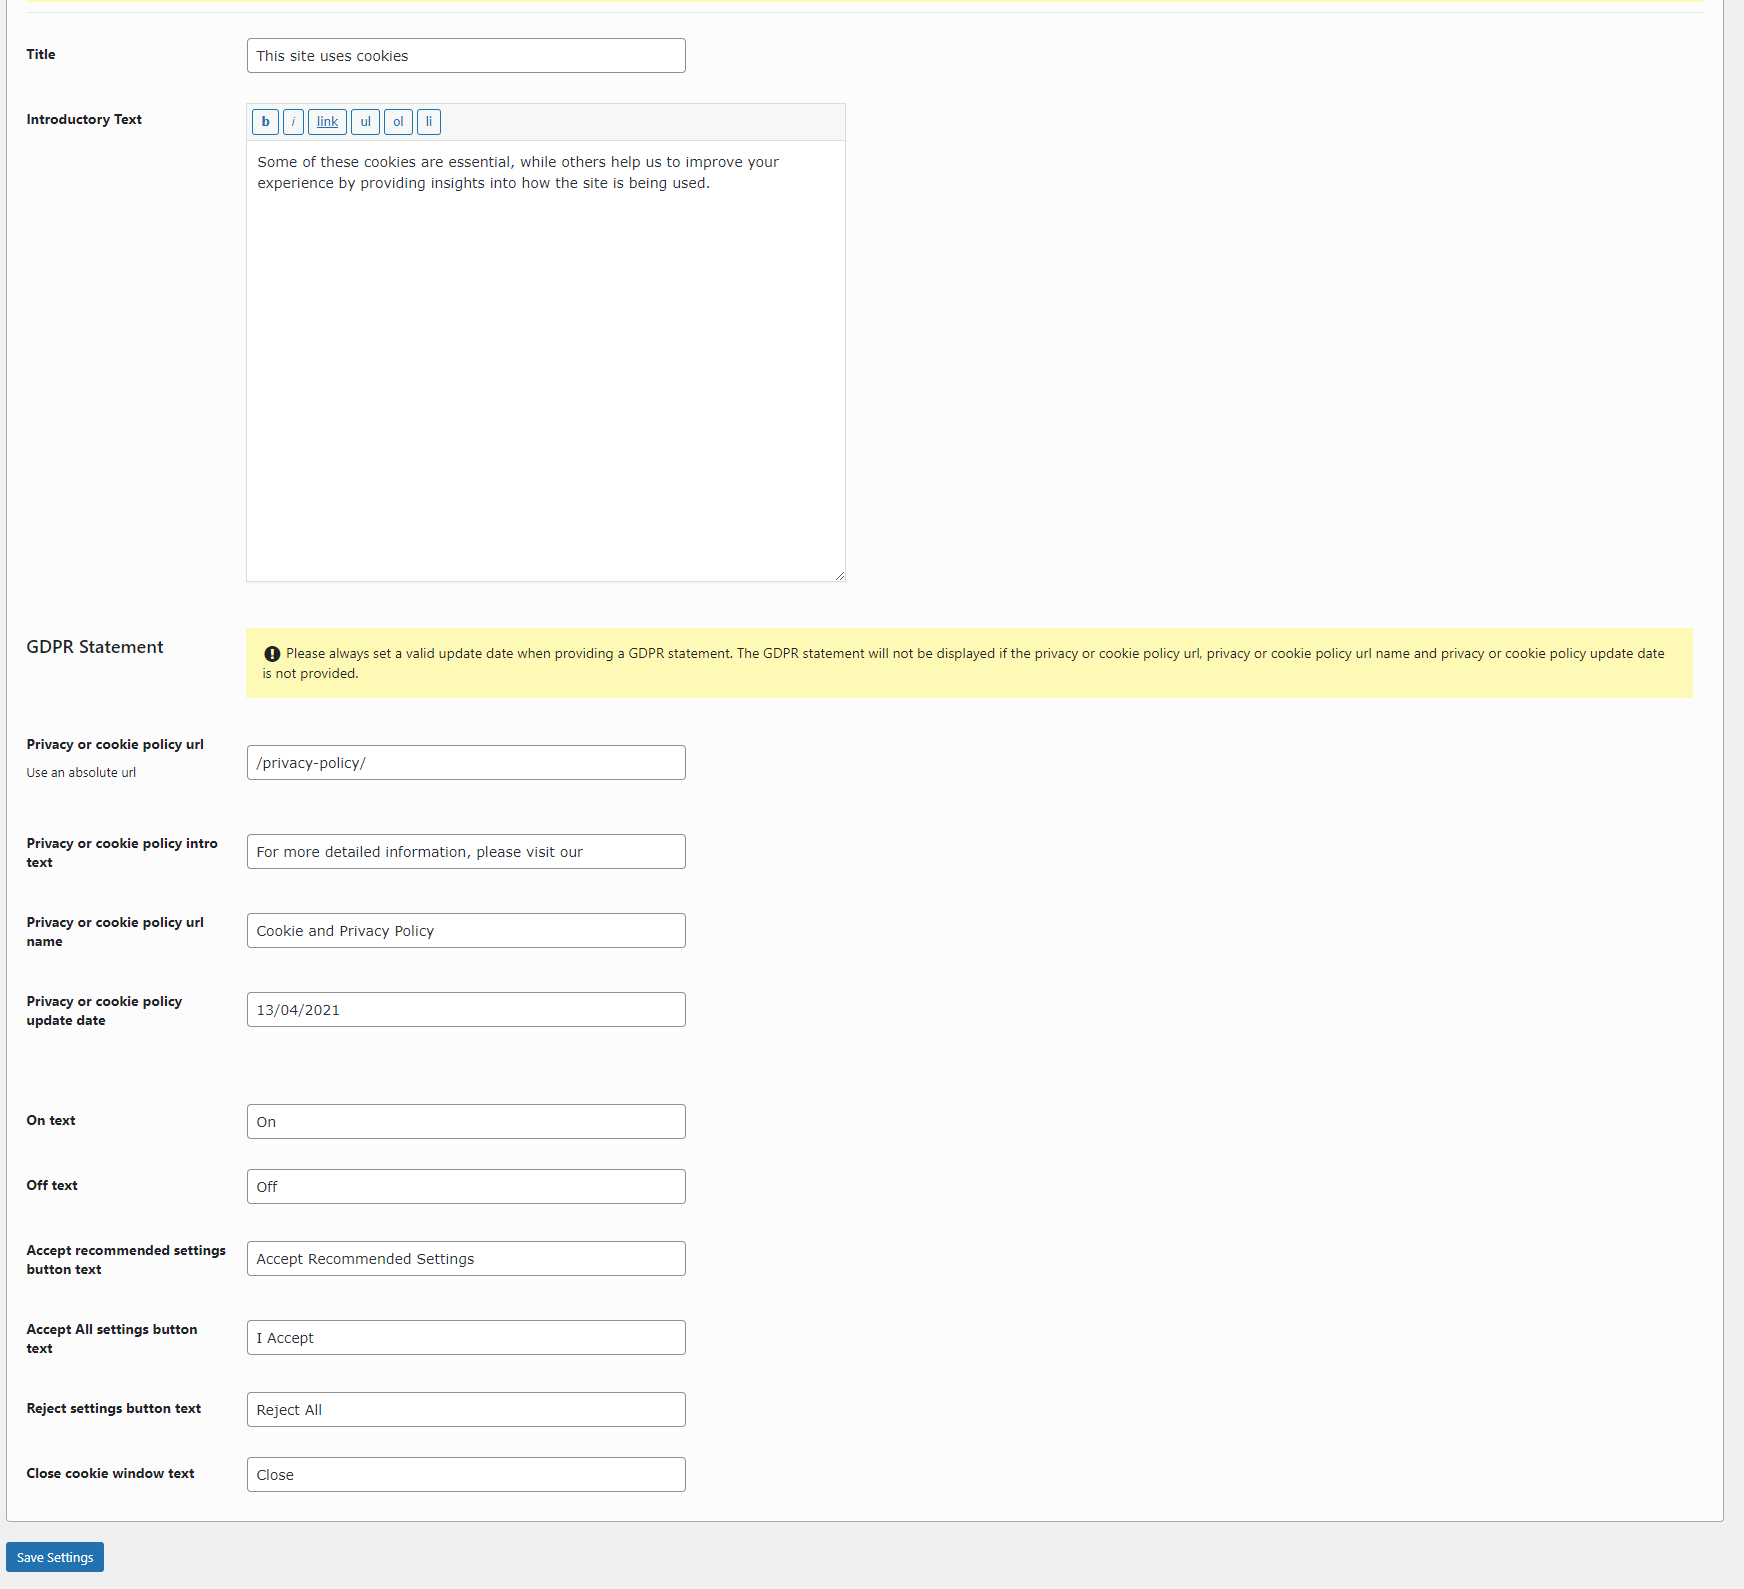
Inevitably all Cookie Control configuration options (i.e. Necessary Cookies, alternative languages, excluded countries) are available and will work as expected using either the DWP GOV.UK pattern or the usual Cookie Control widget.
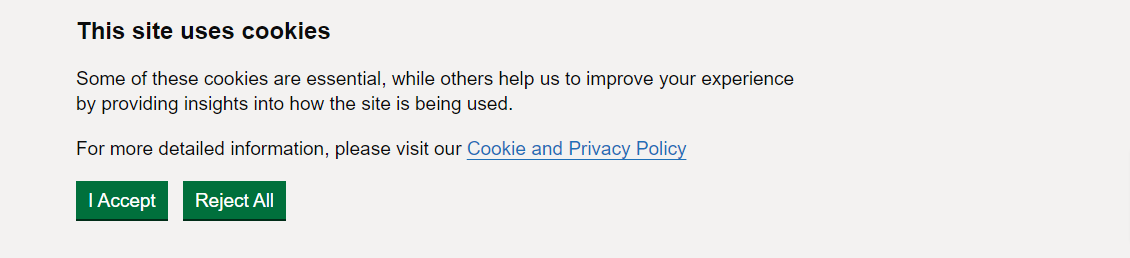
Step 4 : Display DWP
Once the basic settings are configured and the form is saved the GOV.UK banner is displayed the first time a page of the website is visited. The banner persist on every page until the user select an option (i.e. accept, reject and updates his settings). After the user accepts or rejects the use of cookies a confirmation message is displayed until they select “hide” or navigate away from the page.
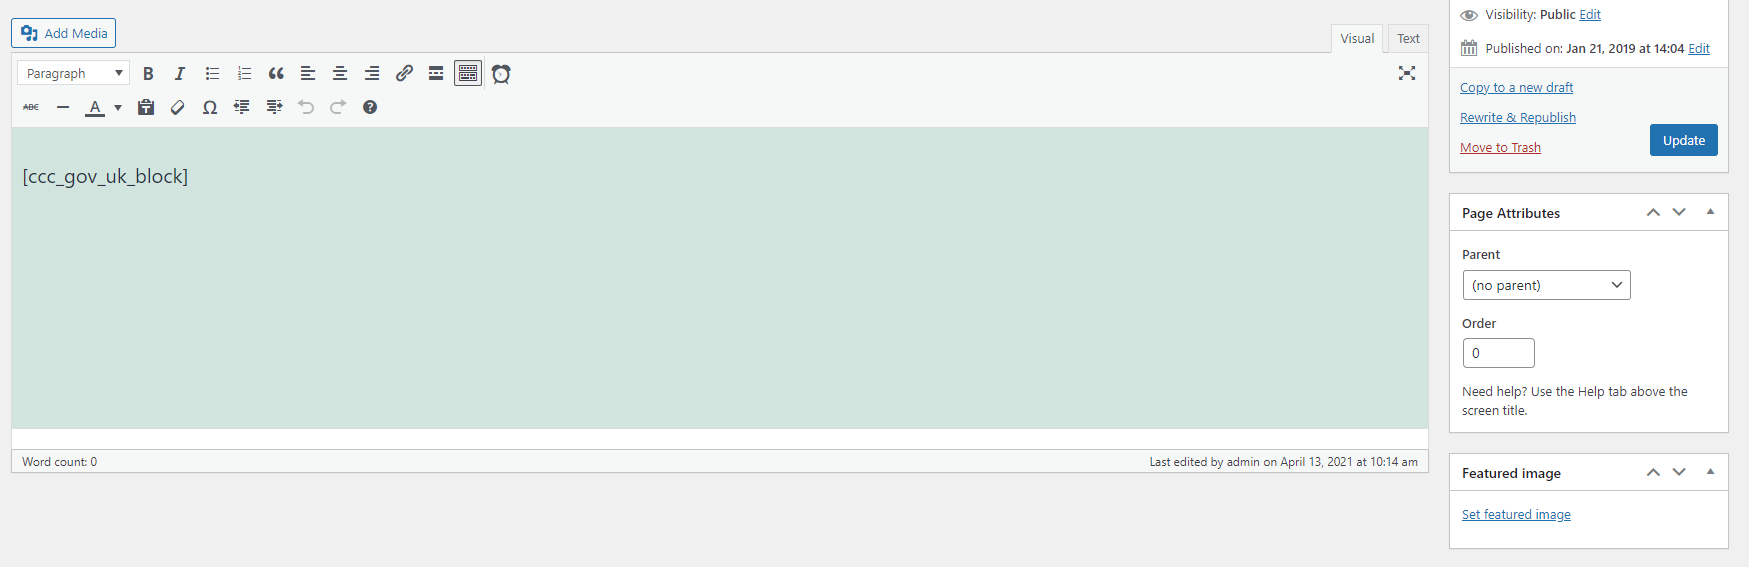
Step 5: Configure Privacy Page
At this stage we are missing the cookie consent dashboard from the privacy policy page. In order to include the corresponding block there we need to edit the privacy policy page and add the shortcode [ccc gov_uk block] to the WordPress page editor.